Flashing PS1Digital using ESP-Prog or a USB serial adapter
Make sure, your ESP-Prog or serial adapter is set up for 3.3V operation!
Quick guide
This procedure can be done without removing the PS1Digital from the console. In that case the 3.3V connection should be left unconnected!
-
Get esptool.py
-
Download the firmware package from here: esp-firmware.zip
This also includes the matching FPGA firmware, which will be applied on first boot
-
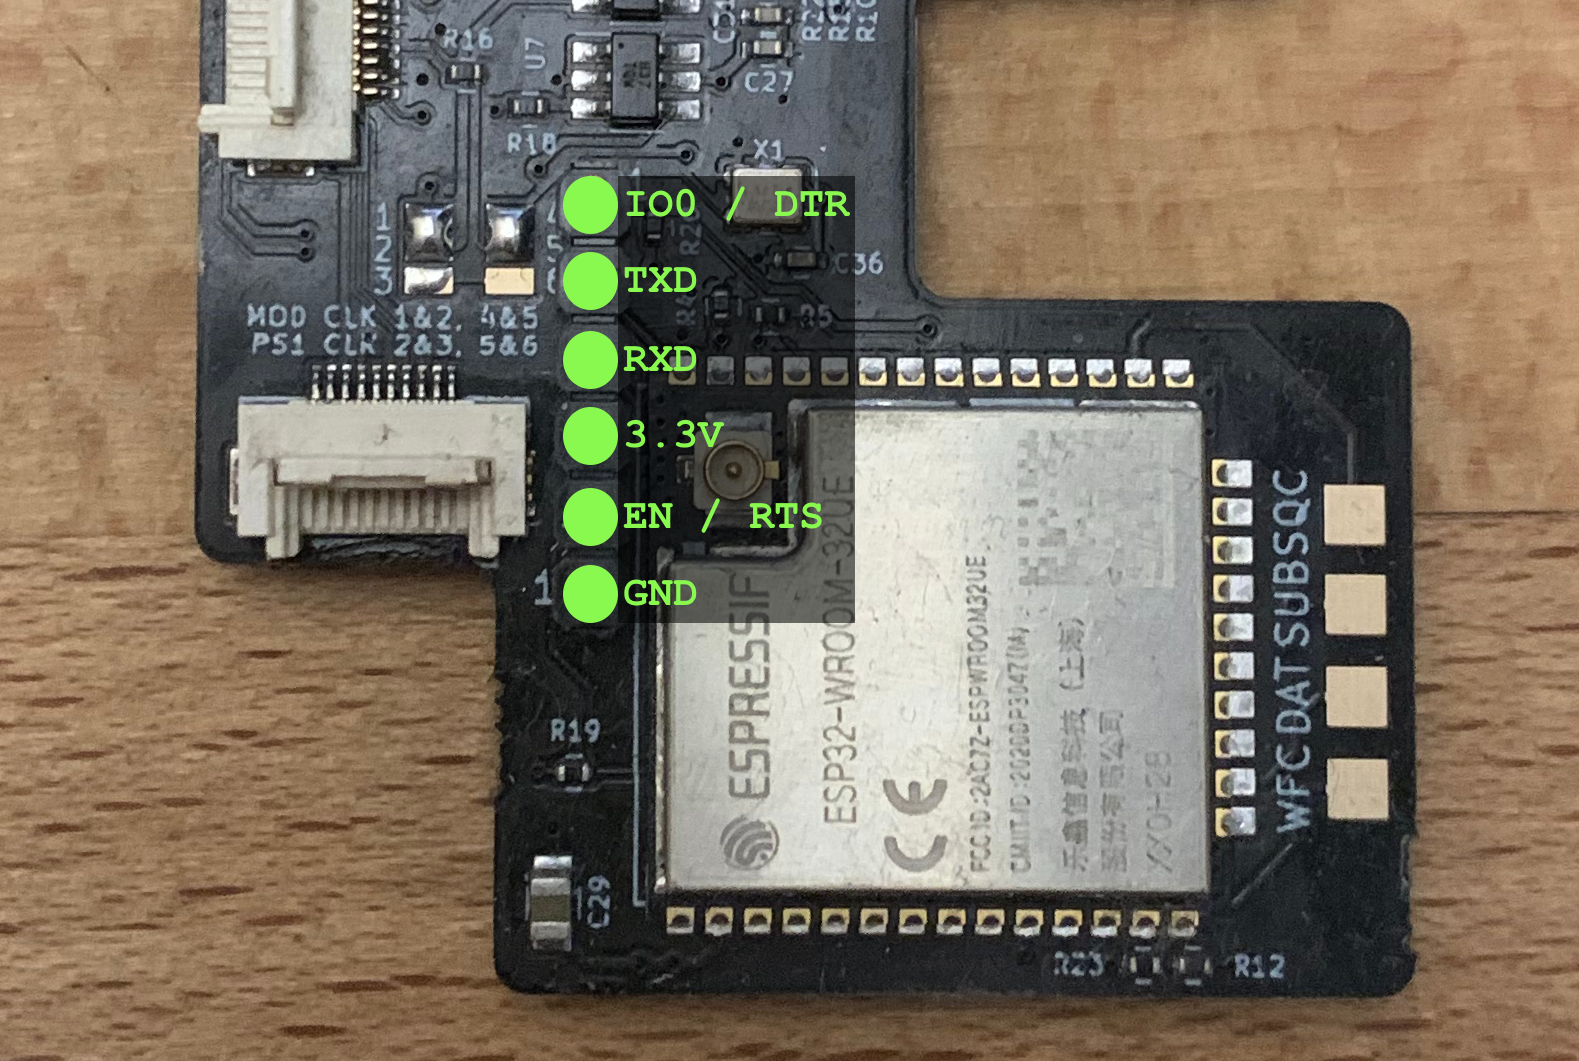
Connect your ESP-Prog / USB serial adapter
for example the official ESP-Prog from Espressif Systems:
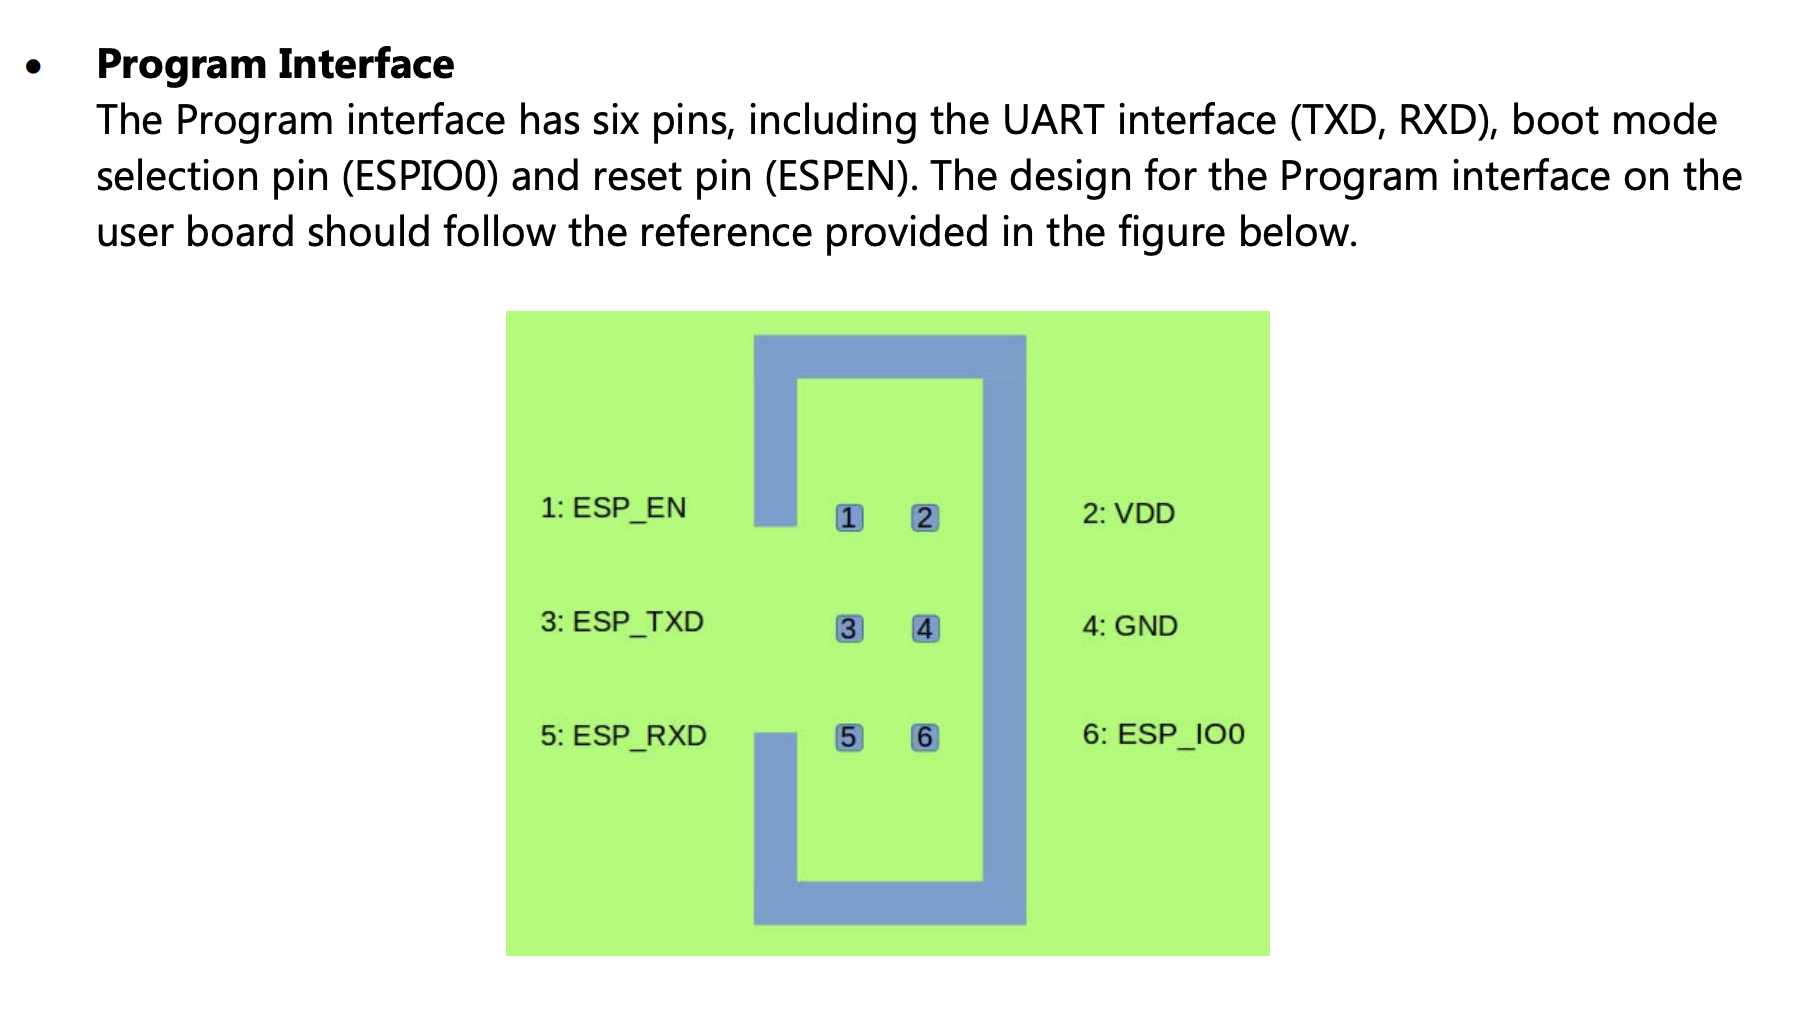
The connections in that case would be:
PS1Digital ESP-Prog Remarks IO0/DTR ESP_IO0 TXD ESP_TXD RXD ESP_RXD 3.3V VDD If PS1Digital is powered from the console, this connection is optional EN/RTS ESP_EN GND GND If using a Sparkfun Beefy 3, you need the following modification for it to work:
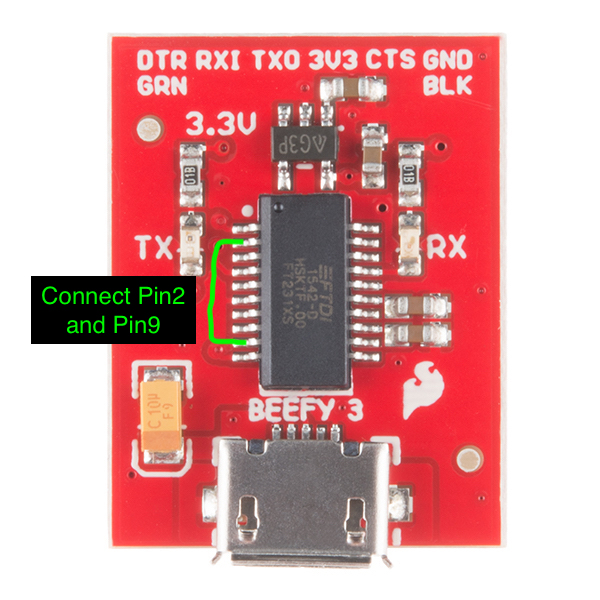
This connects the RTS output to the CTS pin, which is a input by default and therefor cannot be used to trigger the reset without the modification.
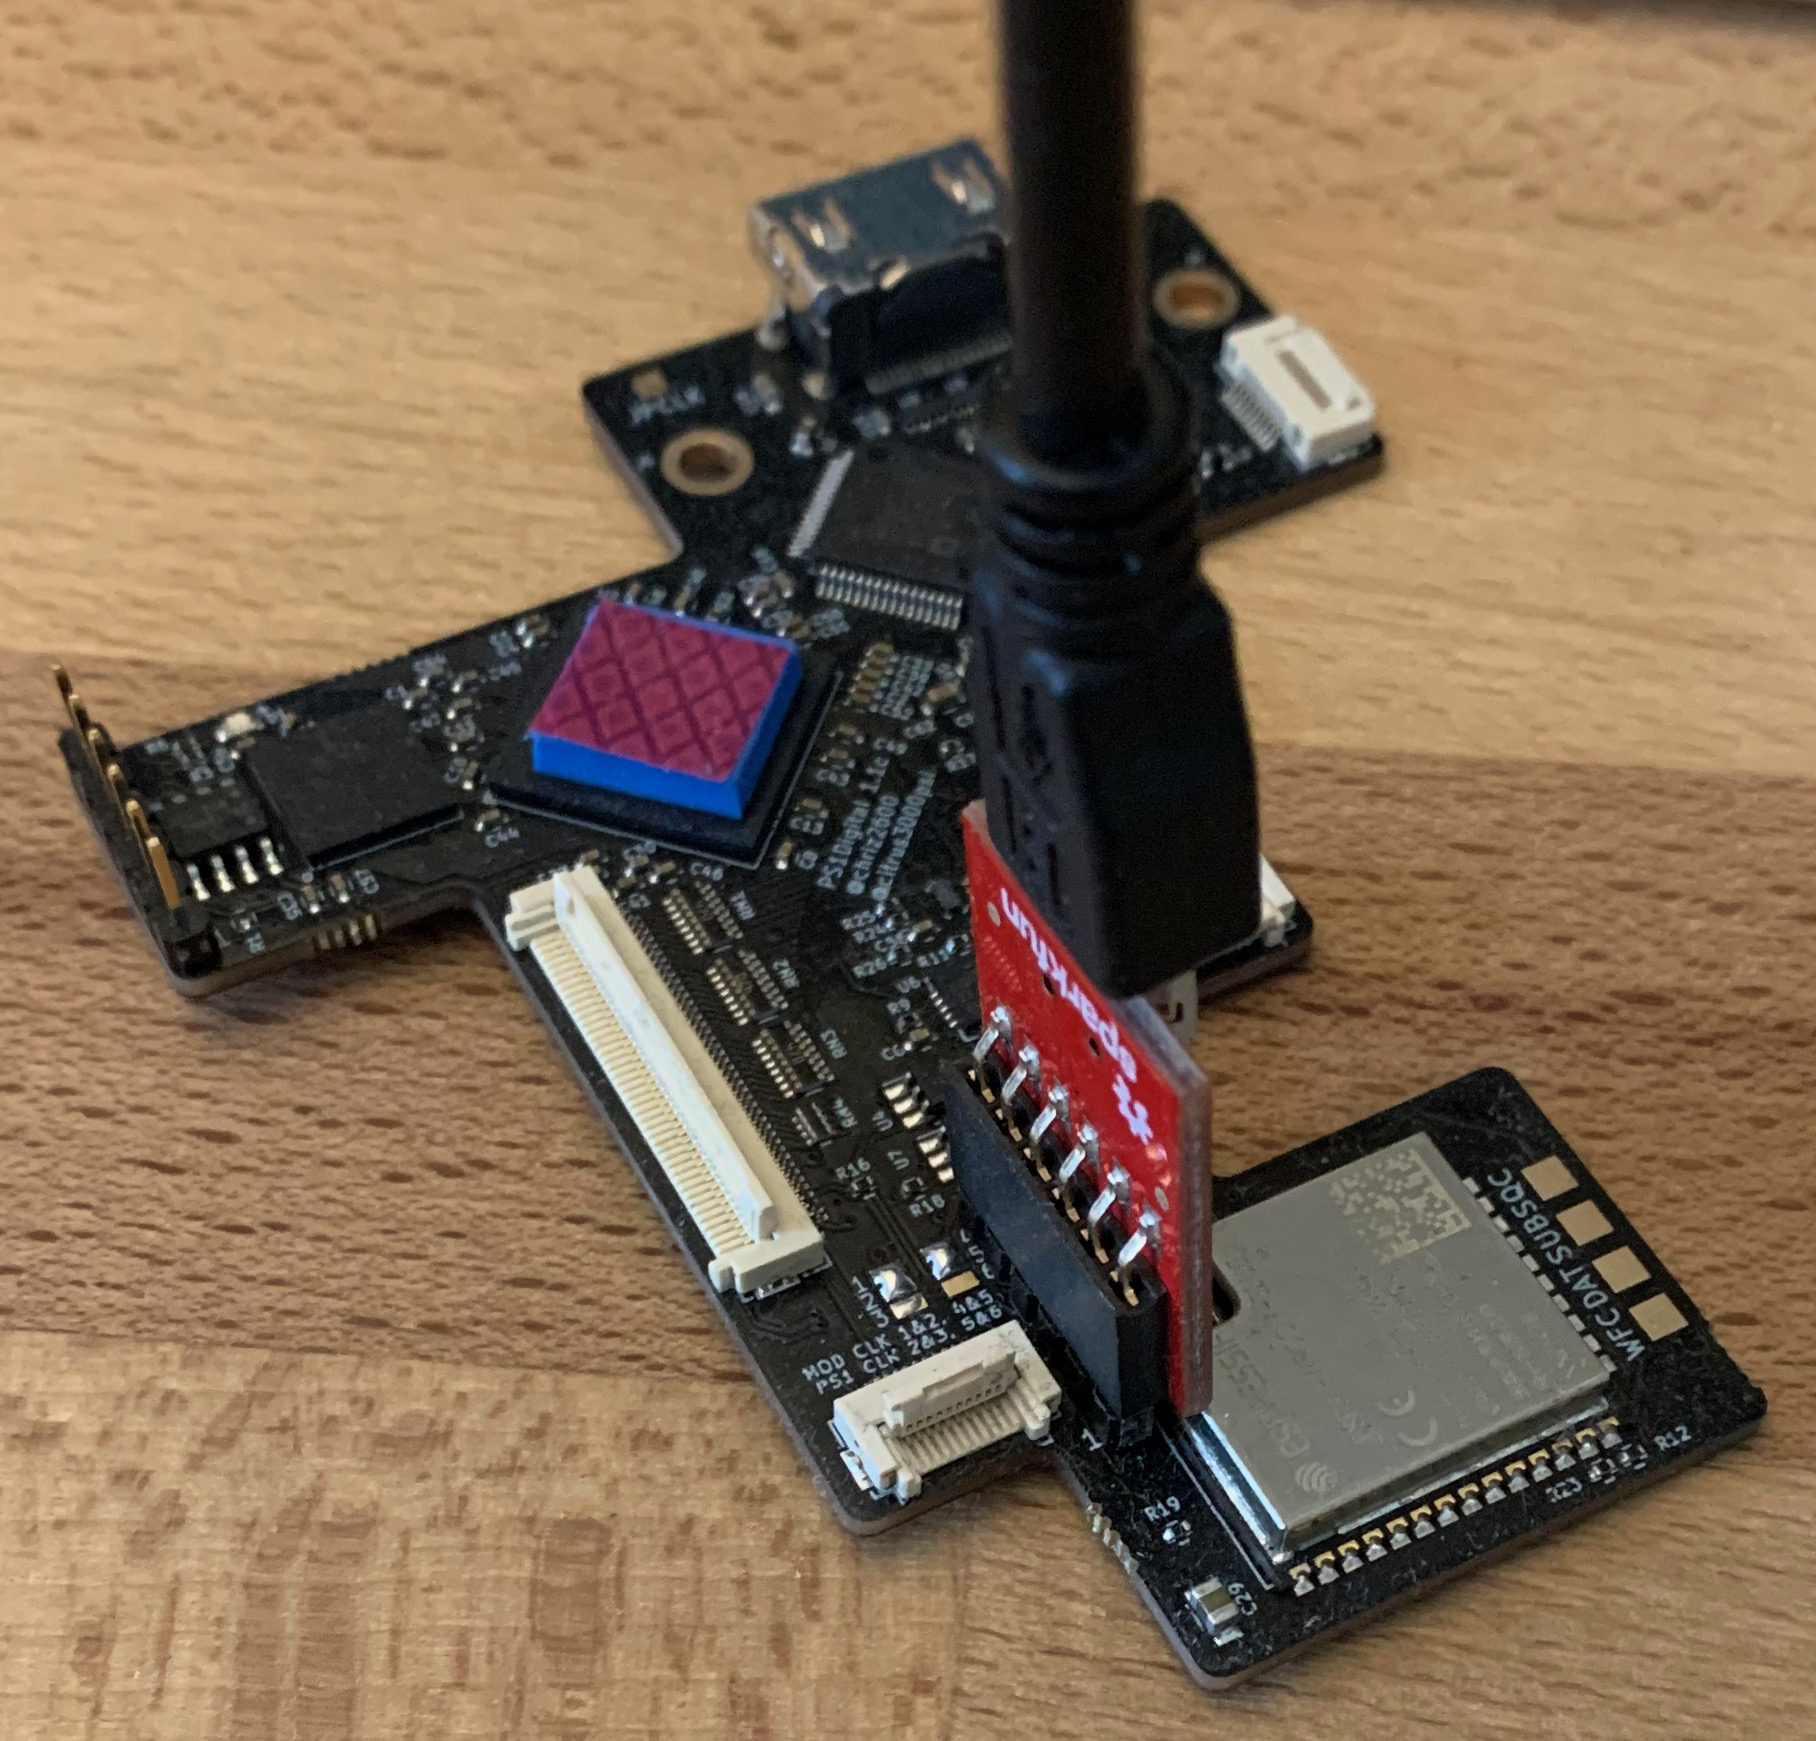
After that the Sparkfun Beefy 3 can be simply connected like this:
-
Extract the package. Inside the package there is a
readme-flash.txtwith theesptool.pycommand.If you're on windows you can ignore the
$SUDOpart, but$SERIAL_PORTmust be replaced with the programmers COM port.Example:
esptool.py --chip esp32 --port COM7 --baud 921600 write_flash 0x0 bootloader.bin 0xA000 partitions.bin 0x10000 firmware.bin 0x650000 ota_data_initial.bin 0x653000 fatfs.bin -
Execute the command. This will flash all required data to the ESP32.